Illuminate Assessment - How to Import student response data into an Flexible Assessment

This lesson will guide you through importing student response data into a Flexible Assessment. This is helpful if you have the student responses stored in an external application and would like them stored in Illuminate
WHERE TO START
Create Assessment First.
Don’t forget to make the assessment in Illuminate first
Prepare Your Data File.
You can import student response data into an assessment using a file that contains their answers(multiple choice items), rubric scores (constructed response and explicit constructed response items), and their local student ID numbers. Your file needs to be in one of these formats:
- Comma Delimited
- Tab Delimited
- Semicolon Delimited
- Colon Delimited
Keep in mind that you can typically turn another file type (such as Excel/.xls) into one of these formats (such as Tab Delimited) by opening the file, clicking File, selecting Save As, and selecting the new file format from the Save As Type drop down menu. Just be sure you widen your columns sufficiently in the initial file so that none of your data "jumps columns" during the transfer. Also, your file must contain one column with Student ID data.
Import Your Data File.
- Access the Import Page and click Administer
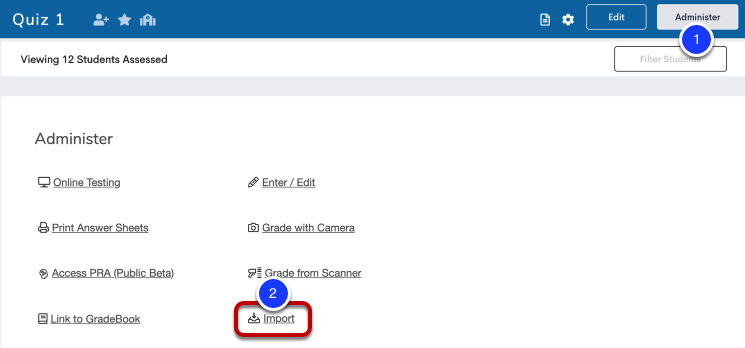
- Click Import.
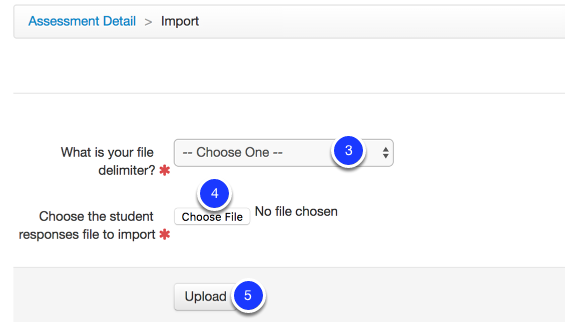
- Upload Your File by selecting the file delimiter that matches your file (Comma, Tab, Semicolon, or Colon).
- Click Choose File. Select the file from your computer.
- Click Upload.
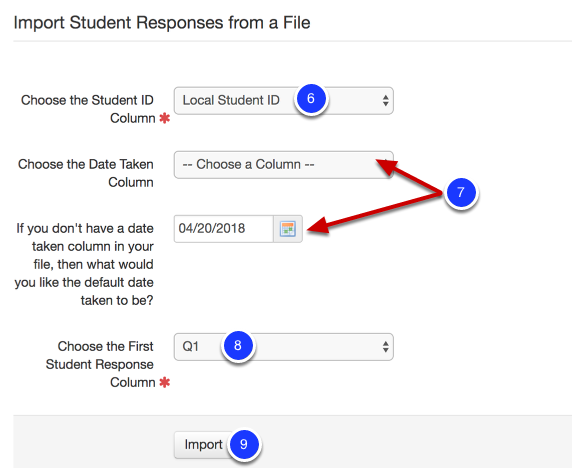
- Select your Local Student ID column in the Student ID field.
- Select your Date Taken column if your file contains this data. If your file does not contain a Date Taken date, choose your default Date Taken date.
- Select one column of response data (typically Question 1) as the First Student Response Column.
- Check that your columns are mapped appropriately, then click Import.
Check Import Status of Your Data File.
10. After pressing Import, you will be re-directed to the Student

Comments
0 comments
Please sign in to leave a comment.